

Table of Contents
- Why Indie Pattern Sizing Confuses Even Experienced Sewists
- How to Measure Yourself for Sewing Patterns
- Body Measurements vs Finished Garment Measurements
- Sewing Pattern Ease Explained: Why Your Size Chart Isn't the Whole Story
- Reading an Indie Pattern Size Chart: Conventions, Ranges, and Unit Conversion
- How to Grade Between Sewing Pattern Sizes
- A Worked Example: From Body Measurements to a Cut Size
- Matching Indie Pattern Sizing to Garment Type and Fit Preference
- Frequently Asked Questions
Last Updated: October 15, 2026
Why Indie Pattern Sizing Confuses Even Experienced Sewists
Indie pattern sizing confuses sewists because every designer builds their own size charts, grades differently, and often offers more sizes than commercial companies.
A size 14 from one indie designer is not a size 14 from another, and pattern sizes differ from ready-to-wear: a dress labeled size 10 in a shop may match a pattern size 16 on paper.
How to Measure Yourself for Sewing Patterns
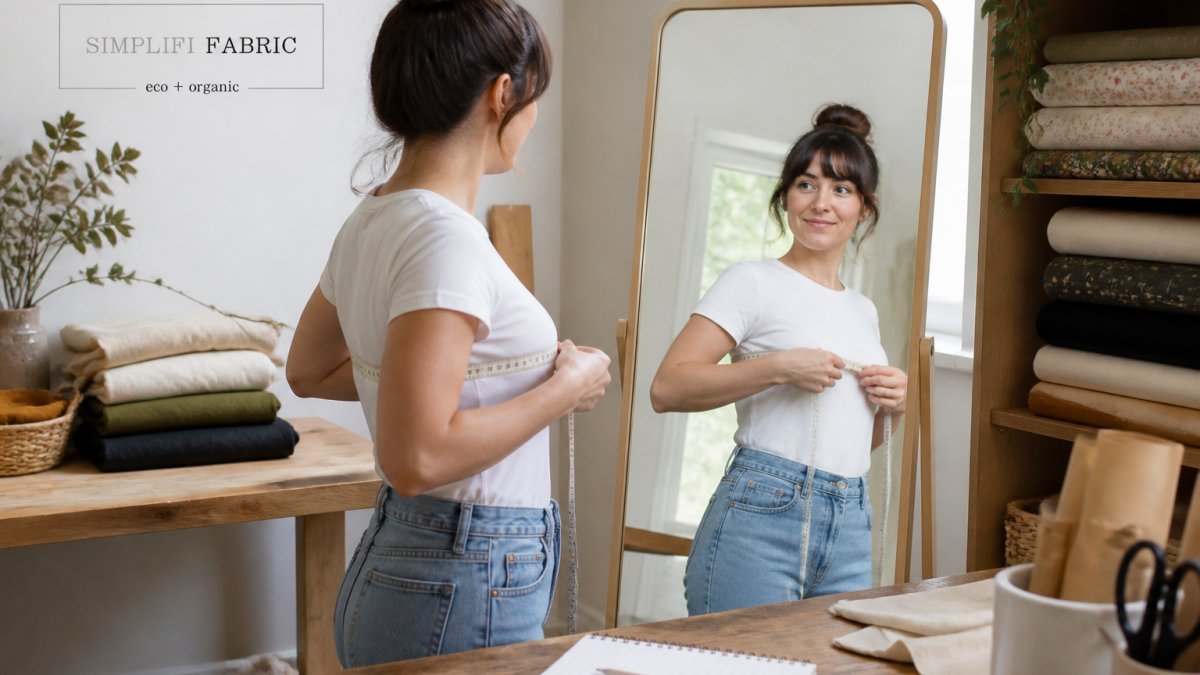
Measure over thin clothing or undergarments, keep the tape snug but not tight, and write every number down. You need a soft tape measure, a mirror, and a helper if available. Stand relaxed, do not suck in or pull the tape.
The Four Measurements That Decide Your Size
Four numbers drive most size decisions:
- Bust or chest: around the fullest part, tape level all the way around
- Waist: at the narrowest point, usually above the navel
- Hips: around the fullest area, often lower than you expect
Some patterns also ask for back length, sleeve length, or torso length. Check the pattern envelope or packet first.
Getting an Accurate Measurement Every Time
Small habits make a big difference:
- Measure over the same clothing each time
- Keep the tape parallel to the floor
- Take each measurement twice and compare
Measuring over jeans or a bulky sweater adds phantom centimeters to your hips and waist.
Body Measurements vs Finished Garment Measurements
Body measurements describe you. Finished garment measurements describe the sewn garment. They are never the same number, and mixing them up is the most common sizing error in indie sewing.
The three numbers you need to keep straight
Every sizing decision involves three distinct numbers:
- Body measurement, your actual circumference at bust, waist, or hip, taken over thin clothing
- Finished garment measurement, the sewn garment's circumference at the same point, listed on the pattern envelope or inside the packet
- Ease, the difference between the two, which is the room the garment gives you beyond your body
The formula: finished measurement minus body measurement equals ease. If your bust is 92 cm and the finished bust is 100 cm, the garment carries 8 cm of ease.
Why the same body can wear two different sizes
Ease is the designer's intent, not a mistake. A fitted bodice might carry 5 cm of ease at the bust; a relaxed shirt might carry 15 cm or more. Two indie patterns with identical size charts can fit completely differently: the chart tells you the body each size is drafted for, while the finished measurements tell you how the garment will actually sit.
A side-by-side comparison
Say your body measurements are bust 96 cm, waist 81 cm, hips 104 cm. Two indie patterns both list you as a size 14 at the bust. But their finished measurements differ:
| Measurement point | Your body | Pattern A finished | Pattern A ease | Pattern B finished | Pattern B ease |
|---|---|---|---|---|---|
| Bust | 96 cm | 101 cm | 5 cm | 112 cm | 16 cm |
| Waist | 81 cm | 86 cm | 5 cm | 97 cm | 16 cm |
| Hip | 104 cm | 109 cm | 5 cm | 120 cm | 16 cm |
Pattern A is drafted fitted, Pattern B relaxed or oversized. Cut a 14 in both and A sits close while B hangs loose, neither is wrong. If you want B closer, size down; if you want A less restrictive, size up. The finished measurements, not the chart, tell you which to do.
How to use finished measurements when you cut
Once you have both numbers, the process is short:
- Find your body size on the chart using bust, waist, and hip.
- Find the finished measurements for that size.
- Subtract your body measurement from the finished measurement to get ease.
- Compare that ease to the designer's intended fit.
- If the ease is larger than you want, size down; if smaller, size up or plan an adjustment.
Sewists who cut their exact body size often find the garment too loose because the designer already built in design ease.
When finished measurements are not listed
Some indie patterns list only body measurements. Then you have three options:
- Check the pattern's product page or the designer's blog, where finished measurements are sometimes published separately.
- Measure the pattern pieces, subtracting seam allowance, to estimate finished circumference.
- Sew a test garment in inexpensive fabric to see how the draft behaves.
None is as fast as a finished measurement column, but all three beat guessing from the size label.
Sewing Pattern Ease Explained: Why Your Size Chart Isn't the Whole Story
Sewing pattern ease is the extra room built into a garment beyond your body measurements. Two kinds matter: wearing ease, the minimum room needed to move, sit, and raise your arms, and design ease, the extra the designer adds on purpose, like a loose, boxy top or a flowing skirt. A fitted bodice might carry 5 cm of ease; a relaxed shirt might carry 15 cm or more.
Reading an Indie Pattern Size Chart: Conventions, Ranges, and Unit Conversion
Indie pattern size charts are not standardized, two designers can both label a size 14 and draft it for bodies 5 cm apart. The chart is the contract, so read it before the size number.
Decode the header row first
Every indie chart has a header row explaining each column. Common labels:
- Size or Size #, the designer's internal label, not a body measurement
- Bust / Chest, body measurement the size is drafted for
- Waist, body measurement at the natural waist
If a chart lists only body measurements, ease is built into the draft and invisible. If it lists finished measurements, you can calculate ease yourself. Read the header before any number.
Indie chart conventions that differ from commercial patterns
Independent designers often use conventions the big commercial companies do not:
- Wider size ranges. Many indie labels draft 10 to 20 sizes in one block, sometimes with separate curve, petite, or tall blocks sold as distinct products. Check which block you are buying before you cut.
- Letter and number hybrids. Some labels use XS-5XL, others 0-32, others both on the same chart. The label is arbitrary; the measurements matter.
- Finished measurements printed for every size. More common in indie patterns than commercial ones, and the single most useful column on the chart.
Unit conversion without second-guessing
One inch equals 2.54 centimeters, the only conversion you need, but direction matters:
- Chart in inches, tape in centimeters: divide your centimeter measurement by 2.54
- Chart in centimeters, tape in inches: multiply your inch measurement by 2.54
Write the converted number beside the original on your measurement sheet. Do not convert in your head mid-cut, a half-centimeter rounding error can shift you between two sizes on a tight chart.
What to do when your measurement falls outside the chart
When a measurement sits outside the size range, you have four options:
- Size to the closest available size and plan an adjustment. Add or remove width at a side seam or princess seam rather than redrafting the whole piece.
- Blend two sizes at the seam. Use the smaller size above the waist and the larger below, or vice versa, drawing a smooth line between them.
- Check whether the designer sells an extended or separate block. Many indie labels offer a curve block, tall block, or graded-up range as a separate purchase.
- Contact the designer. Indie designers are often reachable by email or through their shop and will often recommend a size for your measurements.
Do not guess. A test garment in inexpensive fabric costs far less than ruined good cloth and tells you more than any chart.
A quick chart-reading checklist
Before you cut, confirm:
- Which block you bought (standard, curve, petite, tall)
- Whether the chart lists body measurements, finished measurements, or both
- Which unit the chart uses as its original
Five checks, two minutes, and you avoid the most common indie sizing mistake: cutting a size label instead of a set of measurements.
How to Grade Between Sewing Pattern Sizes
Grading between sewing pattern sizes means drawing a new cutting line that blends two or more sizes on the same pattern piece, bust size at the top, waist in the middle, hip at the bottom.
- Circle your bust size on the bodice line
- Circle your waist size at the waistline
- Circle your hip size at the hip line
- Draw a smooth line connecting all three circles
- Keep the line parallel to the grainline where possible
Blending sizes is normal, not a failure. Most bodies do not match a single column on any chart.
A Worked Example: From Body Measurements to a Cut Size
Say your bust measures 96 cm, waist 81 cm, and hips 104 cm. On the chart, bust 96 cm lands at size 14, waist 81 cm at size 12, and hips 104 cm at size 16.
Cut a 14 at the bust, blend to a 12 at the waist, and grade out to a 16 at the hips.
| Your Measurement | Chart Size | Where to Cut |
|---|---|---|
| Bust 96 cm | 14 | Bodice top |
| Waist 81 cm | 12 | Waistline |
| Hips 104 cm | 16 | Hip line |
Matching Indie Pattern Sizing to Garment Type and Fit Preference
Garment type and fit preference decide which measurement leads.
Ask three questions before cutting:
- How close do I want this to sit?
- Which part of me is hardest to fit?
- Does the designer describe the intended fit as fitted, relaxed, or oversized?
The designer's description is a sizing clue.
For a deeper look at how ease and fit interact across garment types, the Craft Yarn Council's standard body measurement guide offers a useful reference for consistent measuring points, and Threads magazine's guide to pattern ease explains how designers build room into a draft. Beginners nervous about their first garment can also lean on Seamwork's beginner pattern fitting resources for plain-language walkthroughs.
Reading indie pattern sizing comes down to one habit: trust your tape measure, not the number on a store tag.
Simplifi Fabric stocks a curated range of indie sewing patterns alongside organic and ethically sourced fabrics, so you can match the right pattern to cloth you feel good about.
Frequently Asked Questions
How do I choose a size in an indie sewing pattern?
Start with your full bust measurement, then compare it against the pattern's size chart, not your ready-to-wear size. If your bust, waist, and hips land in different sizes, choose the size closest to your bust for tops and dresses, or your hips for skirts and pants, then grade between sizes. Always check the finished garment measurements and stated ease before cutting. When in doubt, make a test garment in inexpensive fabric first.
Are indie sewing pattern sizes the same as ready-to-wear sizes?
No. Indie pattern sizing rarely matches the number on a store-bought garment tag. A size 12 in one indie brand may correspond to a size 16 in another, and neither may match your mall size. This is why reading indie pattern sizing starts with your own body measurements and the specific pattern's size chart, not the size you normally buy. Treat every new pattern as its own sizing system.
What is the difference between body measurements and finished garment measurements?
Body measurements are taken around your actual body at the bust, waist, and hips. Finished garment measurements describe the completed garment's dimensions, including ease. The difference between the two is the ease built into the design. A pattern with a 96 cm finished bust and a 91 cm body bust has 5 cm of ease. Checking both numbers tells you how the garment will actually fit before you cut fabric.
What should I do if my measurements fall between pattern sizes?
Choose the smaller size if you prefer a closer fit, or the larger size if you want more room, then check the finished garment measurements to confirm. Most sewists grade between sizes, using one size at the bust and another at the waist or hips. If your measurement falls outside the chart entirely, size up and plan a test garment, or look for a pattern with a broader size range.